8 Must-Know Premiere Pro Shortcuts to Speed Up Your Editing (Even If You’re a Beginner)
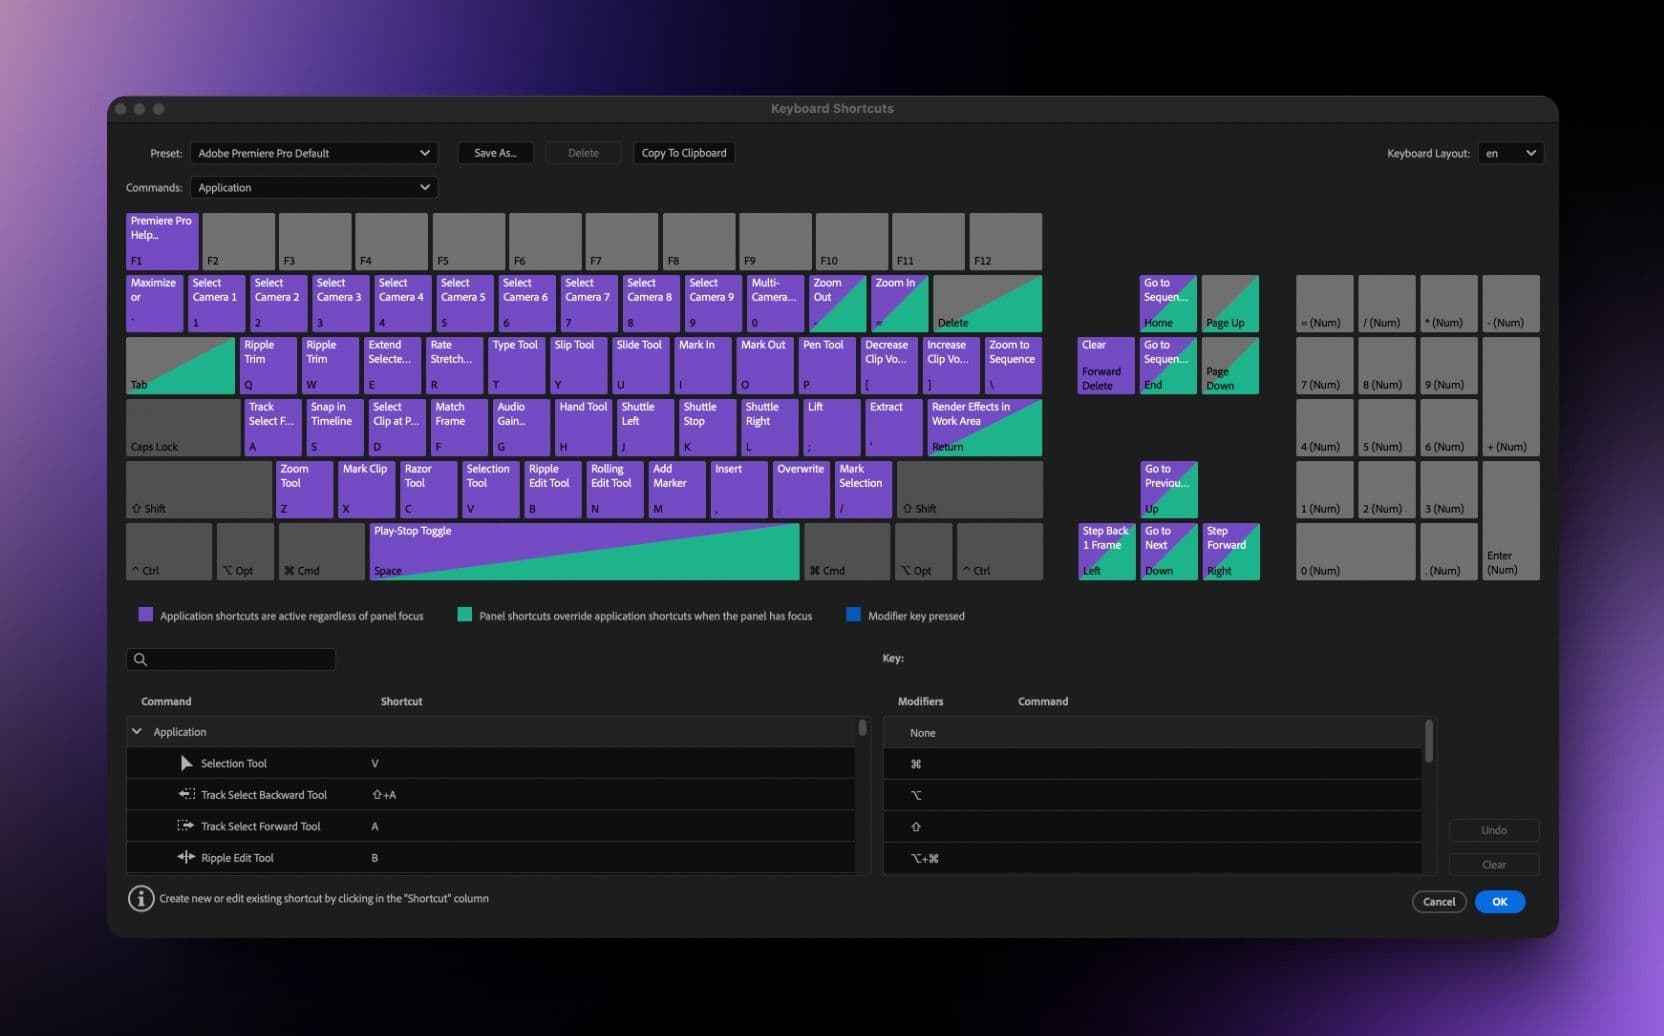
Table of Contents
- 1. Speed Up Playback and Make Quick Cuts
- 2. Fast Navigation Through Timeline
- 3. Move Clips Between Tracks Without Dragging
- 4. Delete Clips and Close Gaps Automatically
- 5. Move Clips Without Disturbing the Timeline
- 6. Apply Default Transition Instantly
- 7. Set In and Out Points for Precise Edits
- 8. Toggle Full-Screen Preview (`)
- Final Thoughts: Maximize Your Editing Speed with Shortcuts
- Spotlight FX - Get free transitions, effects and workflow tools
Feeling overwhelmed by the sheer number of tools and features in Premiere Pro? You’re not alone. One of the quickest ways to speed up your video editing is by mastering a few simple shortcuts. These shortcuts aren’t just for seasoned pros. They’re for anyone who wants to save time and work smarter, not harder.
Below, we’ll explore 8 must-know Premiere Pro shortcuts that will help you edit with ease and confidence. Don’t worry if you’re new to editing - this guide is designed with beginners in mind.
Let’s jump in!
1. Speed Up Playback and Make Quick Cuts
Speed through your footage with the L key to increase playback speed (press multiple times to speed it up further) and hit K to stop. When you find the exact spot for your next cut, use CTRL+K / +K to make the cut. This combination of shortcuts lets you review footage at high speed and make cuts instantly without slowing down.
Why It’s Valuable: These shortcuts keep you focused on the timeline, reducing the need for constant mouse movement and speeding up both playback and cutting processes.
2. Fast Navigation Through Timeline
Navigating the timeline can feel slow if you rely on your mouse. Instead, use / to jump between the next or previous edit points, allowing you to quickly move through your sequence. To move frame by frame, use the / . If you need to jump 5 frames at a time, use shift with / .
Why It’s Valuable: This shortcut speeds up your navigation through the timeline, allowing for precise edits and faster adjustments.
3. Move Clips Between Tracks Without Dragging
When you need to move a clip between tracks, use Alt / with / to move it vertically on the timeline without dragging. This is great for rearranging layers, such as moving a video clip to a higher track or adjusting audio layers. After that, you can nudge the clip 5 frames left or right with alt+shift / +shift with / for precise positioning.
Why It’s Valuable: This shortcut lets you adjust clips quickly and precisely, without having to manually drag and risk misaligning them.
4. Delete Clips and Close Gaps Automatically
Ever removed a section of a clip and been left with an annoying gap on your timeline? With Ripple Delete, you won’t have to worry about manually filling those gaps. Just highlight the clip or portion you want to remove, hit shift+delete / shift+backspace, and Premiere Pro will automatically remove the clip and shift everything over to fill the gap.
This shortcut is a massive time-saver when you're making rough cuts or need to remove multiple sections from your project. Whether you’re editing an interview or a vlog, you’ll love how much faster your timeline becomes to manage with Ripple Delete.
Why You’ll Love It: No more awkward gaps in your timeline, and no need to manually drag clips back into place.
5. Move Clips Without Disturbing the Timeline
Need to move a clip to another part of the timeline but don’t want to mess up your carefully arranged edits? Use ctrl+alt+drag / ++drag to move a clip while keeping everything else in place. This is perfect for repositioning clips without affecting the surrounding media, saving you the hassle of having to readjust everything.
Why It’s Valuable: This shortcut keeps your timeline intact, allowing you to reposition clips seamlessly without disrupting your other edits.
6. Apply Default Transition Instantly
By default, CTRL+D / +D applies the Cross Dissolve transition between clips, which is commonly used for smooth fades. However, you can easily change the default transition to something like Dip to Black. To do this, go to the "Effects" panel, right-click on the Dip to Black transition, and select Set Selected as Default Transition. From then on, every time you use this shortcut, it will apply Dip to Black instead of Cross Dissolve.
Why It’s Valuable: This shortcut lets you instantly apply transitions, and customizing the default transition ensures you're using the effect that best fits your project without extra steps.
7. Set In and Out Points for Precise Edits
Setting in and out points is a critical part of editing, especially when you’re working with large chunks of footage. The I and O keys let you quickly mark the start (in) and end (out) points for your clips. This shortcut works in both the source panel (where you preview raw footage) and on the timeline, making it versatile for selecting specific portions of your video for editing or exporting.
Why You’ll Love It: It’s a faster and more precise way to isolate the parts of your footage you want to keep or remove, without the hassle of dragging markers manually.
Pro Tip: Once you’ve marked your in and out points, you can quickly drag the selected portion to your timeline, saving you time when assembling your sequence.
8. Toggle Full-Screen Preview (`)
When you’re deep in editing, sometimes you need to take a step back and see your work in full-screen mode. Instead of dragging windows or clicking through menus, you can simply press ` (the tilde key, found next to the number 1 on your keyboard). This will instantly switch your preview window to full screen, giving you a better view of the details.
This shortcut is particularly useful for spotting small errors, checking for smooth transitions, or simply viewing your work in a cleaner, distraction-free mode.
Pro Tip: You can toggle full-screen mode on and off easily, so use this when you want to quickly check a preview without changing your workspace layout.
Final Thoughts: Maximize Your Editing Speed with Shortcuts
Premiere Pro is packed with features, but learning the right shortcuts will make your editing experience faster and more efficient. Whether you’re cutting clips, managing your timeline, or previewing your work, these shortcuts will help you save time and keep your focus on creativity.
Start using these 8 shortcuts in your next project, and you’ll notice how much faster and smoother your editing becomes. Keep exploring more shortcuts, and you’ll find yourself working like a pro in no time.
Additional Resources for Beginners
Happy editing!