Video Editing Terms Every Editor Should Know

Table of Contents
If you've ever sat in an edit suite (or opened Premiere Pro for the first time) and had absolutely no idea what someone meant by "J-cut," "picture lock," or "assembly cut," you're not alone.
Video editing has its own language, and learning it is the fastest way to go from confused beginner to confident creator. Whether you're editing YouTube videos, short films, or client work, knowing the terminology helps you work faster, communicate better, and understand what you're actually doing.
In this guide, you'll find a clear breakdown of the most important video editing terms, the 5 stages of post-production, the 12 basic steps of editing, and the 7 laws of editing that professionals still swear by today.
1. What Is Video Editing Terminology?
Video editing terminology is the shared vocabulary that editors, directors, colorists, and sound designers use to communicate during post-production. It covers everything from the names of specific cut types (like an L-cut or a smash cut) to technical concepts like codecs, rendering, and keyframes.
Think of it like learning the rules of a sport. You can play without knowing the terms, but once you understand them, everything clicks faster and you stop second-guessing yourself.
The good news? You don't need to memorize hundreds of definitions overnight. Start with the core terms below, and the rest will come naturally as you edit more.
2. The Most Important Video Editing Terms
Here are the terms you'll encounter most often, grouped by category so they're easier to absorb.
Cuts and Transitions
Cut
The most basic edit in video. One clip ends, another begins. No fancy effects, no fades. Just a straight switch from one shot to the next.
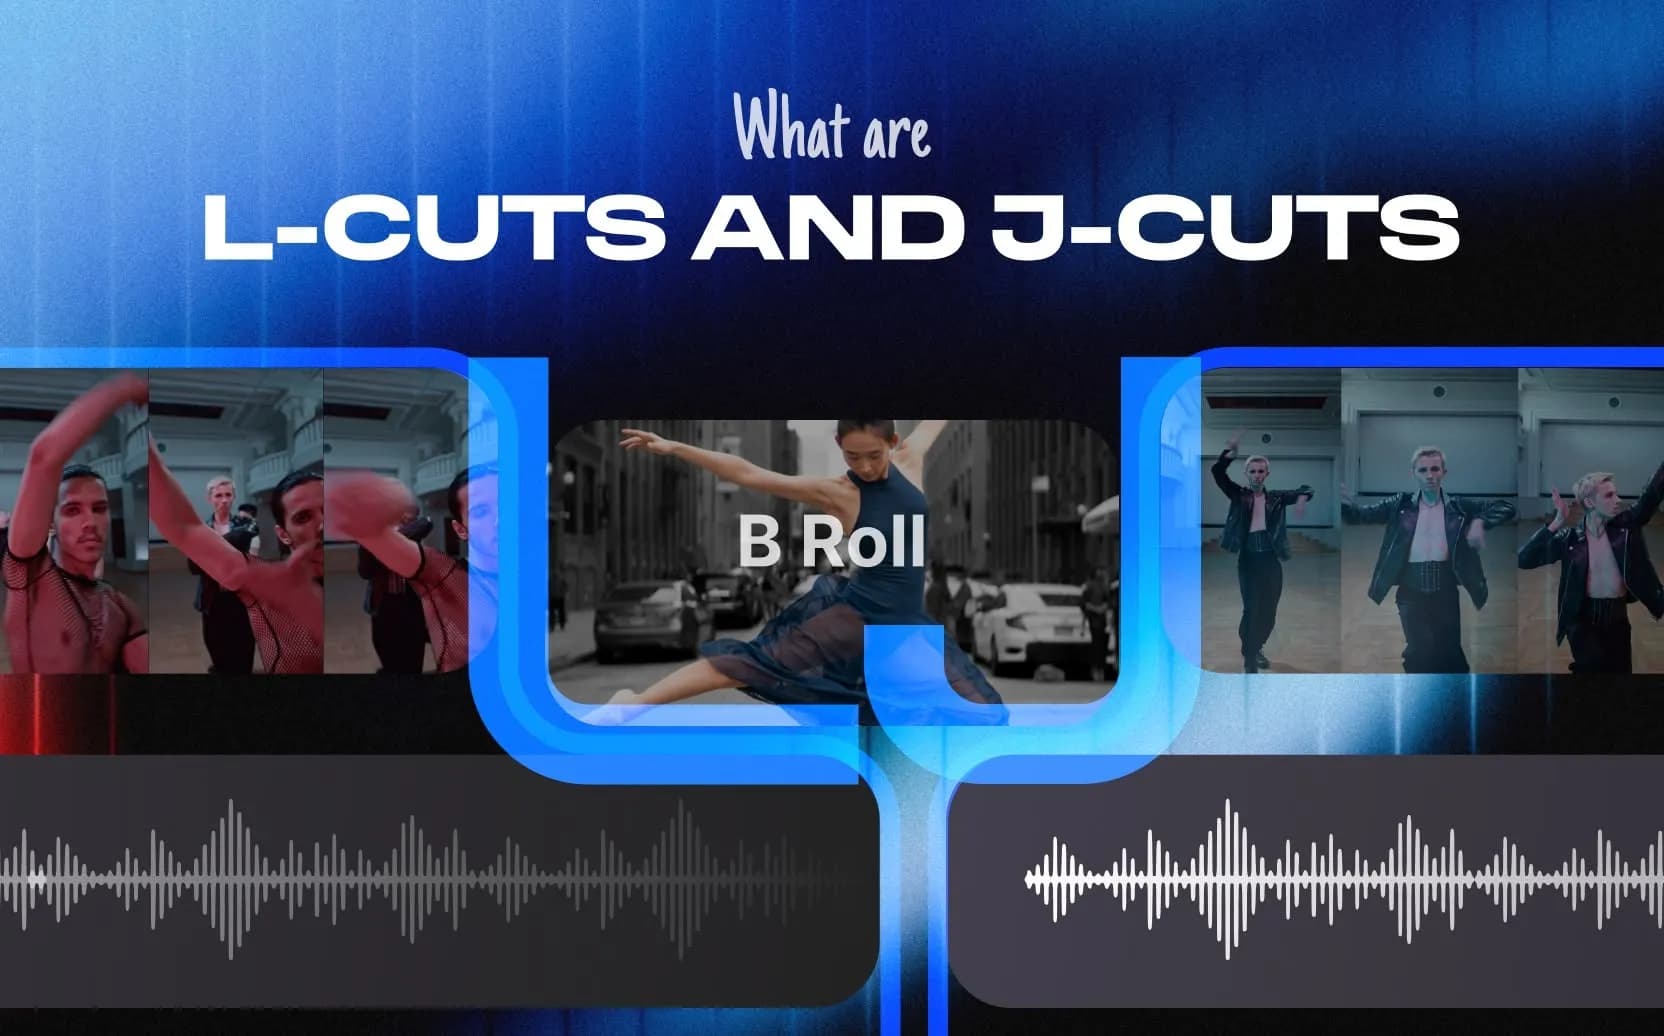
L-Cut
The audio from the outgoing clip continues playing while the next video clip has already started. It creates a natural, seamless feel, especially in dialogue scenes.
J-Cut
The opposite of an L-cut. The audio from the next clip starts before its video appears. It pulls the viewer forward and builds anticipation.
Crossfade
A gradual transition where one clip fades out as the next fades in. Often used to signal a passage of time or a soft scene change.
Smash Cut
An abrupt, high-contrast cut between two very different scenes. Think of a character screaming, then suddenly cutting to silence. It's jarring on purpose.
Cutaway
A shot that cuts away from the main action to show something related, like a reaction shot or a close-up of an object. Also called a cut-in.
Editing Stages and Versions
Assembly Cut
The very first version of your edit. All usable clips are placed on the timeline in order. It's rough, it's long, and it's not meant to be pretty. It's just the starting point.
Rough Cut
A more refined version of the assembly cut. Basic pacing is in place, transitions are added, and the structure starts to make sense. Still not final.
Fine Cut
The version just before picture lock. Everything is polished, feedback has been incorporated, and the edit is nearly done.
Picture Lock
The point where the visual edit is officially approved and no more changes will be made to the cut. Sound design and color grading happen after this.
Technical Terms
Timeline
The main workspace in your editing software where you arrange clips, audio, effects, and graphics in sequence.
Keyframe
A marker that defines the start or end point of an animation or effect change, like a position shift, opacity fade, or scale adjustment.
Codec
Software that compresses and decompresses video files. Different codecs affect file size, quality, and compatibility. Common ones include H.264, ProRes, and DNxHD.
Resolution
The number of pixels in a video frame. Higher resolution means sharper images. Common resolutions include 1080p (Full HD) and 4K.
Rendering
The process of your computer processing all edits, effects, and transitions to produce the final video file. It can take seconds or hours depending on complexity.
Non-Linear Editing (NLE)
A digital editing method that lets you access and modify any clip at any point without affecting the original footage. Adobe Premiere Pro and DaVinci Resolve are NLEs.
Non-Destructive Editing
Editing that preserves your original files. Changes are applied as layers or adjustments, so you can always go back to the source.
Audio Terms
ADR (Automated Dialogue Replacement)
Re-recording dialogue in a studio to replace poor-quality audio captured on set. Actors lip-sync to their original performance.
Foley
Custom sound effects created in post-production to match on-screen actions, like footsteps, door creaks, or fabric rustling.
Voiceover
Narration or commentary recorded separately and placed over the video footage.
Audio Mixing
The process of balancing and combining multiple audio tracks, including dialogue, music, and sound effects, into a final, cohesive mix.
Sweetening
Polishing the audio with effects, music, and sound design after the rough mix is done.
Visual and Graphics Terms
B-Roll
Supplemental footage used to support the main story, cover cuts, or add visual context. In an interview, for example, B-roll might show the subject doing their work while they speak.
Chroma Key (Green Screen)
A technique that removes a solid color (usually green or blue) from the footage and replaces it with another background.
Compositing
Layering multiple video elements, like footage, graphics, and effects, into a single, seamless image.
Lower Third
A graphic placed in the lower portion of the screen, typically used to display a person's name or title.
Establishing Shot
A wide-angle shot used at the beginning of a scene to show the audience where the action is taking place.
Ken Burns Effect
A technique that slowly pans and zooms on a still image to simulate camera movement. Named after documentary filmmaker Ken Burns.
Letterboxing
Adding black bars to the top and bottom of a video to preserve the original aspect ratio when displayed on a different screen format.
Workflow and Organization Terms
Stringout
A preliminary timeline where all raw footage is arranged in sequence before the editor starts selecting the best clips.
Sequence
A flexible editing canvas (or timeline) inside your NLE. You can have multiple sequences for different versions of the same project.
Bin
A folder inside your editing software used to organize clips, audio files, and assets.
TRT (Total Running Time)
The full duration of the finished video, including credits.
Slug
Blank black video or silent audio used as a placeholder or filler in the timeline.
3. The 5 Stages of Video Editing
Post-production isn't just "cutting clips together." It's a structured process with distinct stages, each building on the last. Here's how it breaks down.
Stage 1: Collect, Log, and Organize Footage
Before you touch the timeline, you need to know what you're working with. This stage involves importing all your footage, audio, and assets into your editing software and organizing everything into labeled bins or folders.
Good organization here saves hours later. Separate your A-roll (primary footage like interviews or main action) from your B-roll, and label everything clearly.
Stage 2: Rough Cut or Assembly
Now you start building. Select the best takes, arrange them on the timeline in story order, and create a basic structure. This is where you figure out what the video is actually going to be. Don't worry about perfection here. The goal is to get something watchable so you can evaluate the pacing and structure.
Stage 3: Fine Cut or Picture Lock
This is where the real editing happens. You smooth out transitions, tighten pacing, incorporate feedback, and refine every cut until the edit feels right. Once everyone approves the cut, you reach picture lock, and the visual edit is done.
Stage 4: Sound Design, Music, and Audio Editing
With the picture locked, you focus entirely on audio. This includes cleaning up dialogue, adding ADR if needed, placing sound effects, recording or selecting music, and mixing everything into a balanced final audio track.
Stage 5: Color Correction, VFX, Titles, and Export
The final stage covers everything visual that isn't the edit itself. Color correction ensures consistency across shots. Color grading gives the video its look and feel. Visual effects, titles, lower thirds, and end credits are added. Then the video is exported in the right format for its destination, whether that's YouTube, broadcast, or a client delivery.
4. The 12 Basic Steps of Editing
If the 5 stages are the big picture, these 12 steps are the actual process you follow inside those stages. Think of this as your editing checklist.
1. Import your footage
Bring all your video files, audio, graphics, and assets into your editing software. Keep everything organized from the start.
2. Organize and make selects
Review all your footage and pick the best takes. Separate A-roll from B-roll and label clips clearly.
3. Create an assembly cut
Arrange your selected clips on the timeline in story order. Don't worry about polish. Just get the structure down.
4. Trim and refine clips
Remove unnecessary parts, tighten up the pacing, and make sure every clip earns its place in the edit.
5. Edit your A-roll
Focus on the primary story. Review dialogue, adjust timing, and make sure the narrative flows naturally.
6. Incorporate B-roll
Layer in supplemental footage to support the story, cover cuts, and add visual variety.
7. Add transitions and basic effects
Use transitions sparingly and purposefully. A well-placed crossfade or cut can do a lot. Avoid overloading the edit with effects.
8. Adjust and balance audio
Set levels for clear dialogue, reduce background noise, and make sure audio is consistent throughout.
9. Integrate music and sound effects
Add music and SFX once the edit length is stable. Time them to the pacing and emotional beats of the video.
10. Polish with color correction, grading, titles, and graphics
Correct color inconsistencies, apply a grade for style, and add any text, lower thirds, or motion graphics.
11. Review and get feedback
Export a draft and watch it back with fresh eyes, or share it with a client or collaborator for notes.
12. Make final revisions and export
Incorporate feedback, add any final touches, and export the video in the right format for its platform.
5. The 7 Laws of Editing
These come from Edward Dmytryk's 1976 book On Film Editing, and they're still referenced by professional editors today. They're not rigid rules, but they're a solid foundation for making smart editing decisions.
Law 1: Never Make a Cut Without a Positive Reason
Every cut should serve a purpose. If you can't explain why you're making a cut, don't make it. Arbitrary edits break the viewer's experience without adding anything.
Law 2: When in Doubt, Cut Long Rather Than Short
If you're unsure exactly where to cut, err on the side of leaving a little more footage. It's easier to trim later than to fix a cut that feels rushed or jumpy.
Law 3: The "Fresh" Is Preferable to the "Stale"
Introduce new visual elements before key moments to keep the audience engaged. Showing a new location or character before something important happens maintains interest and avoids a flat, static feel.
Law 4: All Scenes Should Begin and End with Continuing Action
Avoid starting or ending a scene on a static, lifeless frame. Cut in and out while something is happening. This creates the feeling that life continues beyond the edges of the frame.
Law 5: Cut for Proper Values Rather Than Proper Matches
Dramatic impact matters more than visual continuity. If a slightly mismatched cut creates more tension or emotion, use it. Don't sacrifice storytelling for the sake of technical perfection.
Law 6: Substance First, Then Form
Technical skill is only valuable when it serves the story. An editor who prioritizes emotional truth over flashy technique will always make a better film. The craft exists to support the content, not the other way around.
Law 7: Watch Actor Eyes for Timing Cues
Dmytryk emphasized paying close attention to an actor's eyes when deciding where to cut. The moment a thought registers in an actor's eyes is often the perfect cut point. It's subtle, but it makes a huge difference in how natural a scene feels.
Final Thoughts
Learning video editing terminology is one of those things that pays off immediately. Once you know what an L-cut is, you start noticing it everywhere. Once you understand picture lock, your workflow becomes more structured. Once you internalize Dmytryk's laws, your cuts start feeling more intentional.
The language of editing isn't gatekeeping. It's a shared shorthand that makes the whole process faster and clearer.
If you want to put all of this into practice without spending hours building effects from scratch, Spotlight FX gives you instant access to transitions, text animations, overlays, and workflow tools directly inside Adobe Premiere Pro and After Effects. Everything is drag-and-drop, fully customizable, and always up to date.
Frequently Asked Questions
What is video editing terminology?
Video editing terminology is the vocabulary used by editors and post-production professionals to describe techniques, tools, and processes. It includes terms like rough cut, keyframe, B-roll, and picture lock, all of which help editors communicate clearly and work more efficiently.
What are the 5 stages of video editing?
The 5 stages are: (1) collecting and organizing footage, (2) creating a rough cut or assembly, (3) refining to a fine cut and picture lock, (4) sound design and audio editing, and (5) color grading, visual effects, titles, and final export.
What are the 12 basic steps of editing?
The 12 steps are: import footage, organize and make selects, create an assembly cut, trim and refine clips, edit A-roll, incorporate B-roll, add transitions and effects, adjust audio, integrate music and SFX, polish with color and graphics, review and get feedback, then make final revisions and export.
What are the 7 laws of editing?
Edward Dmytryk's 7 laws are: (1) never cut without a reason, (2) cut long rather than short when in doubt, (3) prefer the fresh over the stale, (4) begin and end scenes with continuing action, (5) cut for dramatic value over visual match, (6) prioritize substance over form, and (7) watch actor eyes for timing cues.
Related Posts


 Video Editing