Getting Started with Spotlight FX for Premiere Pro
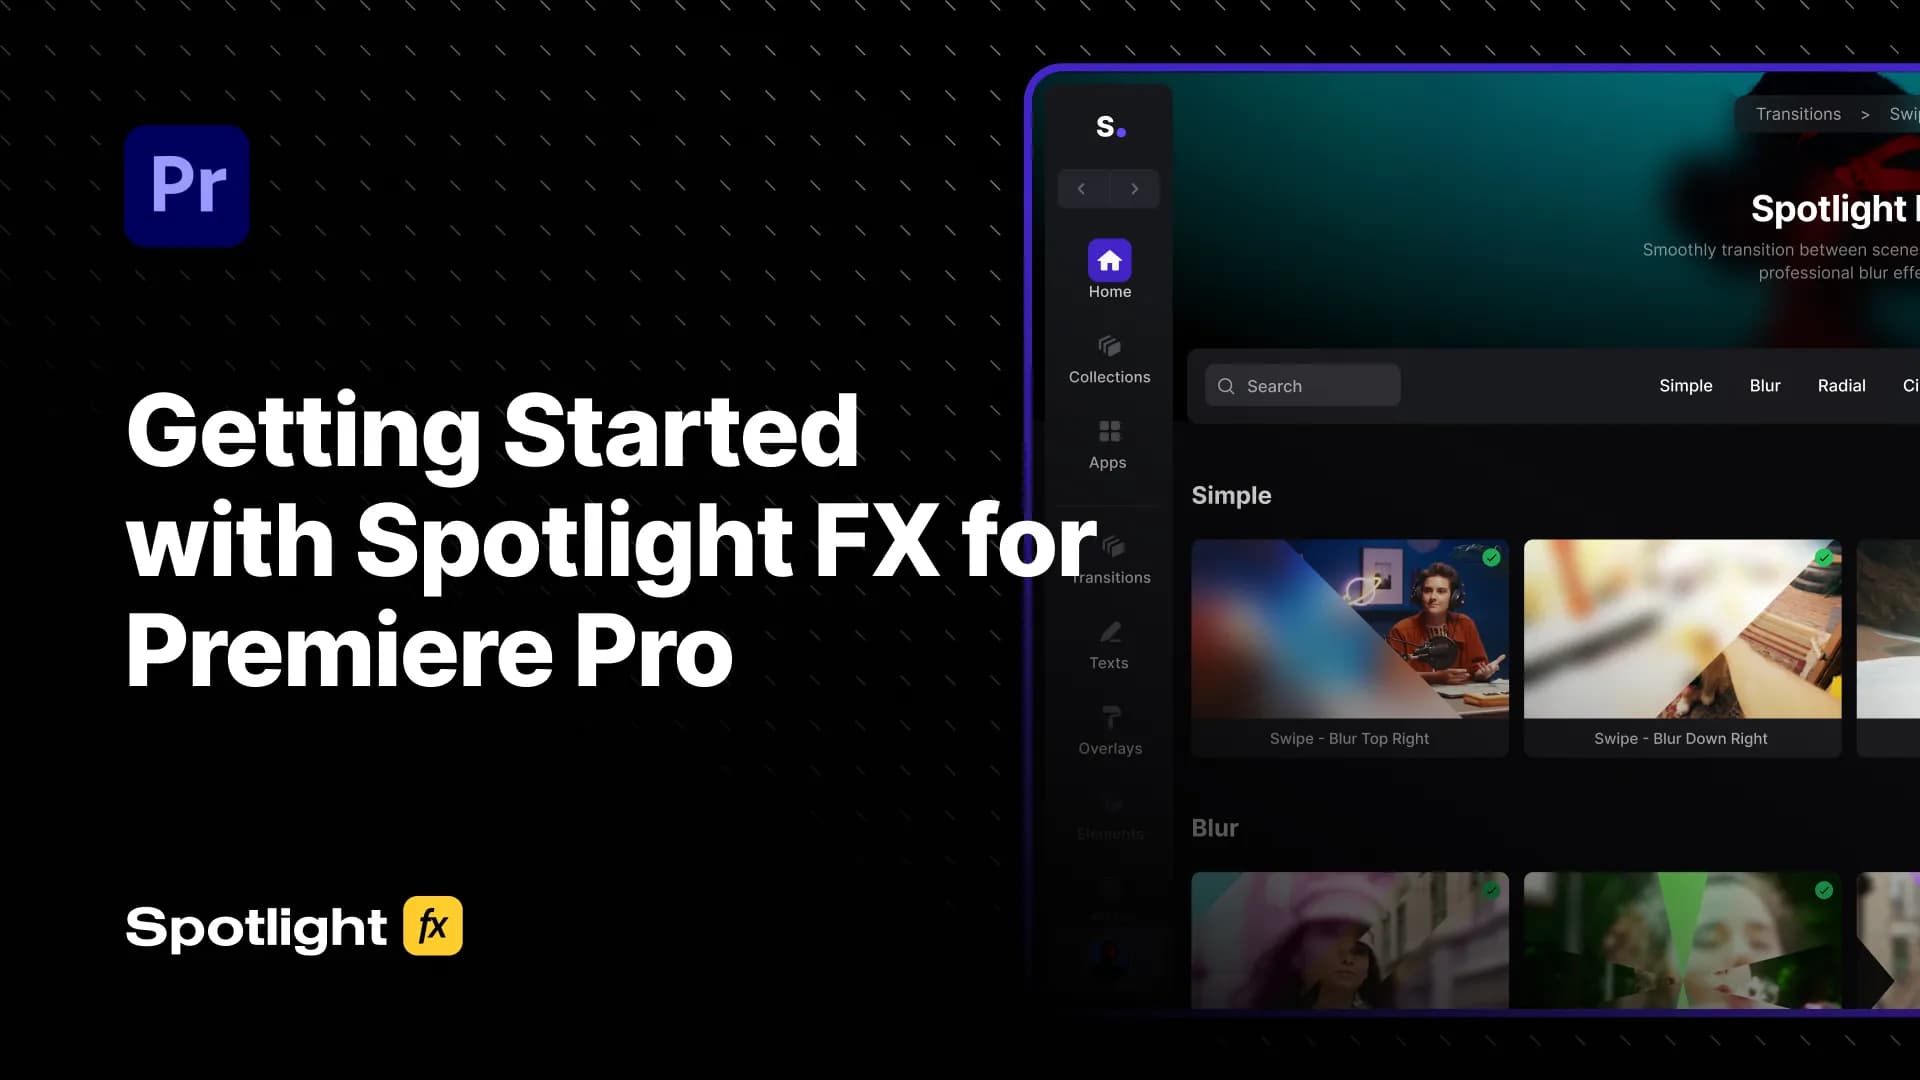
Table of Contents
If you just installed Spotlight FX and aren't sure where to start, this is for you. I'll walk you through the whole thing, from opening the plugin to importing your first item and customizing it. It's simpler than it looks.
Install Spotlight FX
Download the installer from spotlightfx.com/plugin. On Windows you get a .exe, on Mac a .pkg. Double-click it, follow the steps, and Spotlight FX installs automatically in both Premiere Pro and After Effects. That's it. No manual file moving, no ZXP installer, no Adobe Exchange.
Open Spotlight FX in Premiere Pro
Once it's installed, open Premiere Pro with a project loaded. Go to:
Window → Extensions → Spotlight FX
The panel opens inside Premiere. You can dock it wherever you want, just like any other panel.
Import Items: Two Ways
Option 1: Select clips first
Select one or more clips on your timeline, then double-click any item in Spotlight FX. The item imports directly above your selected clip. If you select two clips and import a transition, it lands right at the cut between them. No manual dragging, no guessing where to place it.
Option 2: Use your playhead
Don't select anything. Just move your playhead to wherever you want the item to appear and double-click. It imports at that exact position. This is great for building scenes from scratch or dropping elements onto an empty timeline.
Both methods work with transitions, texts, overlays, and elements. Use whichever fits how you're working at that moment.
Edit Items with the Built-In Editor
Every item in Spotlight FX has its own editor. By default, it opens automatically right after you import something. You can also open it manually at any time by clicking the Editor button in the bottom right of the app.
From there you can change text, colors, timing, opacity, and effects, depending on the item. Everything is exposed in a clean panel. You don't need to open any compositions or dig through the Essential Graphics panel. Just adjust what you need and move on.
Toolbox: Workflow Tools Built In
Next to the Editor button you'll find the Toolbox. This is where the workflow scripts live. For Premiere Pro, you get:
- Zoomy - professional zooms with motion blur, applied to an adjustment layer so your footage stays untouched
- Moovy - footage moves with IN/OUT animations, customizable speed and easing
- Blending Modes - quick access to Add, Overlay, Screen in one click instead of five
- OBS Chapters Extractor - pulls chapter markers from OBS recordings directly into your Premiere timeline
- Change Language - switch Premiere Pro's language instantly without going into preferences
These are the tools Adobe didn't build in. They're included on every plan, even free.
Collections: Assets Organized by Vibe
If you're working on a specific type of video, Collections will save you a lot of time.
Instead of scrolling through every transition and overlay in the library, Collections group assets by style and use case. Hip-hop music videos, VHS aesthetic, wedding, true crime, startup product demo, and more. Each collection has items that actually match the vibe you're going for.
So if you're editing a hip-hop video, open that collection and everything inside already fits. No second-guessing whether a transition is too clean or too soft for the style. It's already curated for you.
Search: Find Anything Fast
You're not limited to searching by exact item names. Every item has hidden tags and a description behind it, so you can search by style, feeling, or use case.
Type "glitch" and you'll get glitch transitions, glitch overlays, glitch text effects. Type "cinematic" or "vhs" or "meme" and the relevant items show up. It works the way you'd actually think about what you need, not the way a file system is named.
A Few More Things Worth Knowing
Liked items
See something you want to come back to? Click the heart icon on any item to like it. Everything you've liked shows up in My Library, so you're not hunting for it again next project.
Tutorials inside the app
There's a Tutorials section in the app. It shows every tutorial we've released, and clicking any of them takes you to the full video on the website. If you want to recreate a specific look you've seen, start there. Each tutorial lists the exact items used so you can follow along 1:1.
That covers the core of it. Install, open, import, edit, and use the tools that make sense for your project. The rest you'll figure out as you go.
If something's unclear or you run into anything, hit the chat in the app or find us on Discord. We read everything.
Tom Balev
Co-Founder of Spotlight FX